Prompt Builder
The Prompt Builder is the primary interface in Kompass used to create, configure, and manage AI prompts. It allows users to design prompts that power AI agents, workflows, and applications.
Prompt Types Overview
Kompass supports two prompt types, each designed for a specific execution context:
| Prompt Type | Where It Appears | Supports Variables |
|---|---|---|
| Workflow Prompt | LLM Component in a Workflow | ✅ Yes — for test data generation and evaluation |
| Agent Prompt | Prompt Template of an Agent | ❌ No |
Workflow prompt type supports two completion formats:
- Text Completion — for single-instruction tasks such as summarization, classification, or data extraction
- Chat Completion — for conversational, multi-message tasks
Agent prompt type supports only Text Completion
Prompt Evaluation
Workflow Prompts support template variables (e.g. {{customer_feedback}}). These variables enable test data generation and evaluation in the Prompt Evaluation section. See the Prompt Evaluation guide for details.
Flow 1: Creating a Workflow Prompt
Workflow Prompts are used within the LLM Component of a Workflow. They support template variables, making them testable and evaluable.
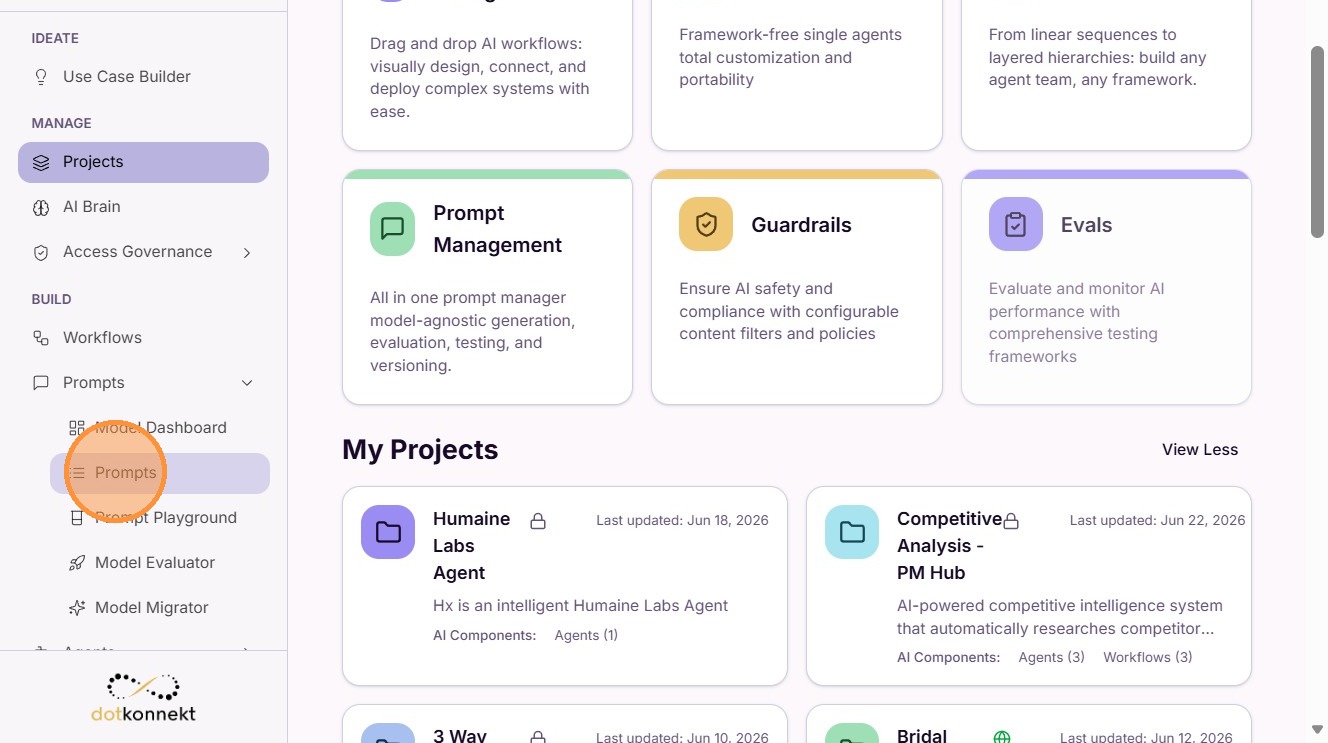
Step 1: Navigate to Prompts
Go to the Kompass dashboard and click Prompts in the sidebar.
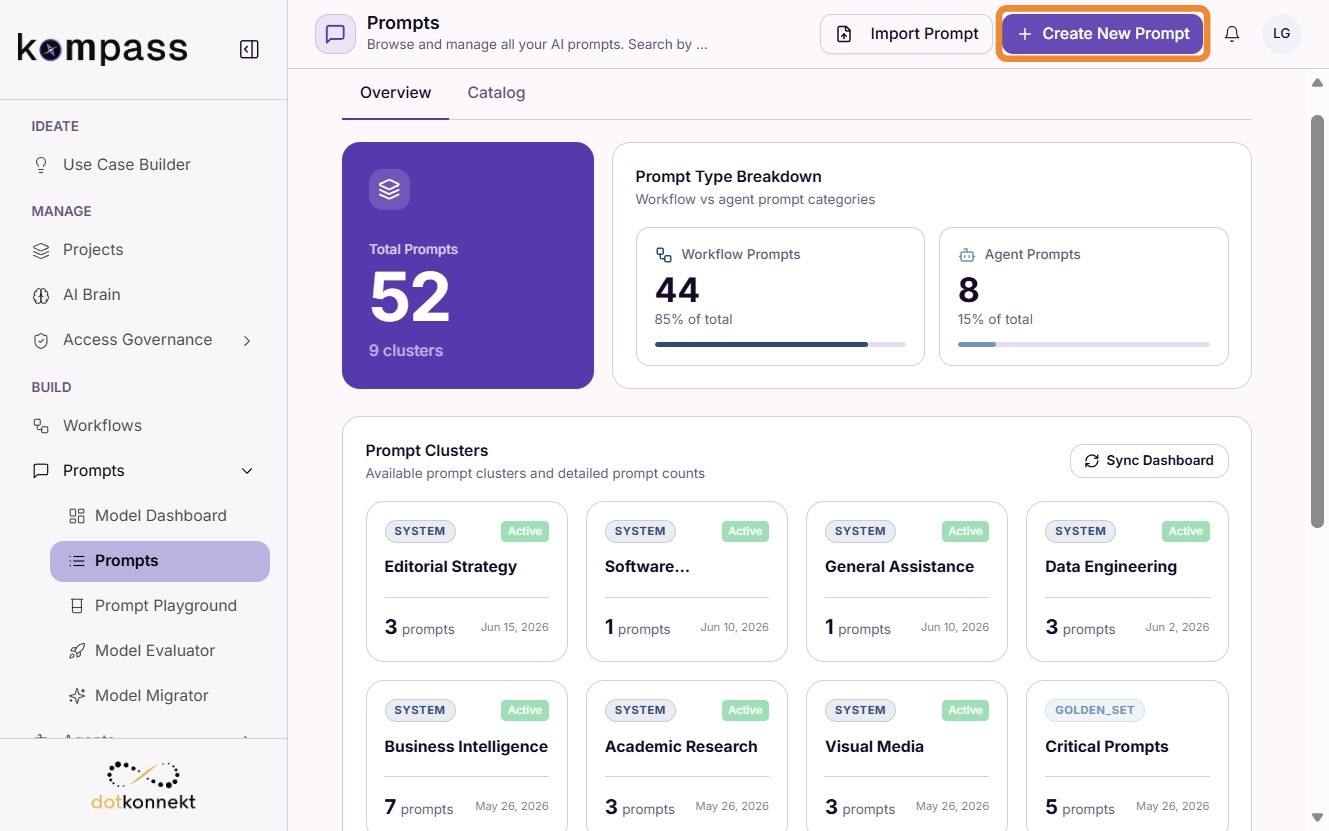
Step 2: Create a New Prompt
Click Create New Prompt.
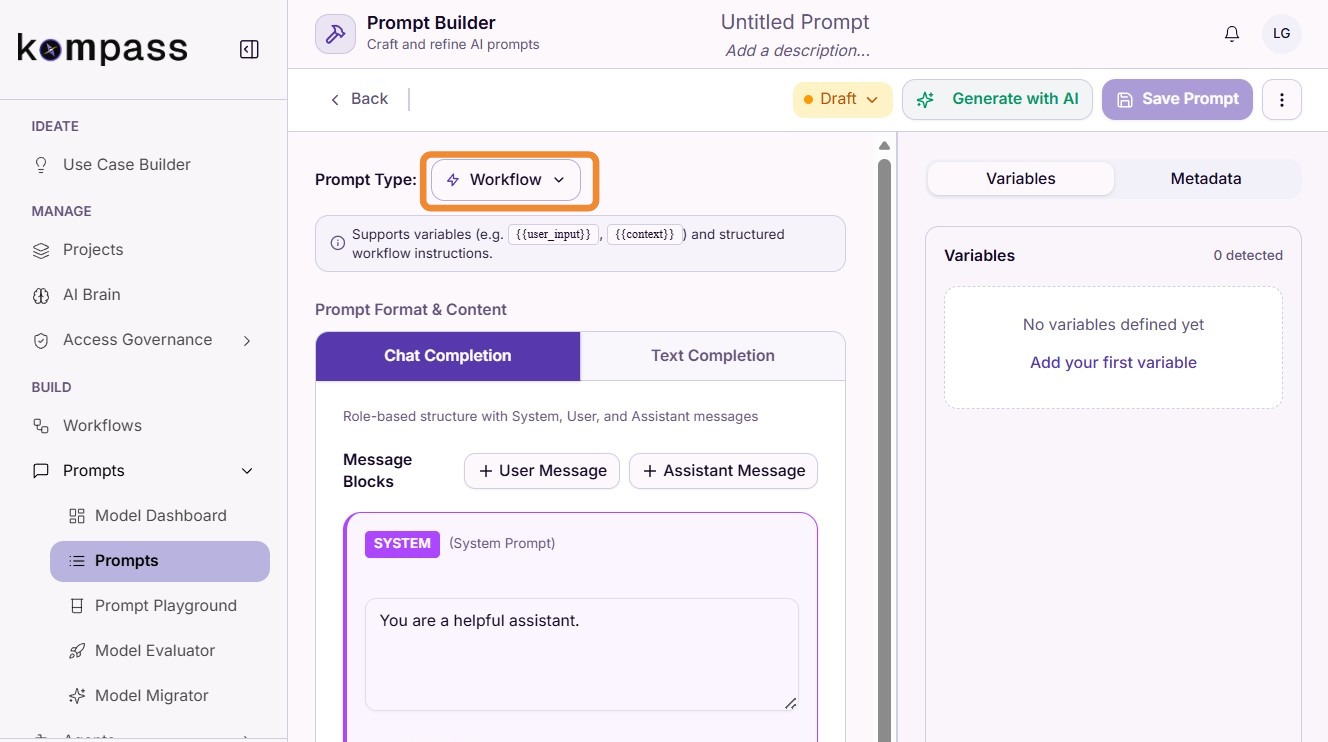
Step 3: Select Prompt Type — Workflow
Choose Workflow Prompt as the prompt type. This distinguishes it from an Agent Prompt and enables variable support.
Step 4: Select Completion Format
Choose either Text Completion or Chat Completion depending on your task.
Text Completion — single instruction tasks (summarization, extraction, classification)
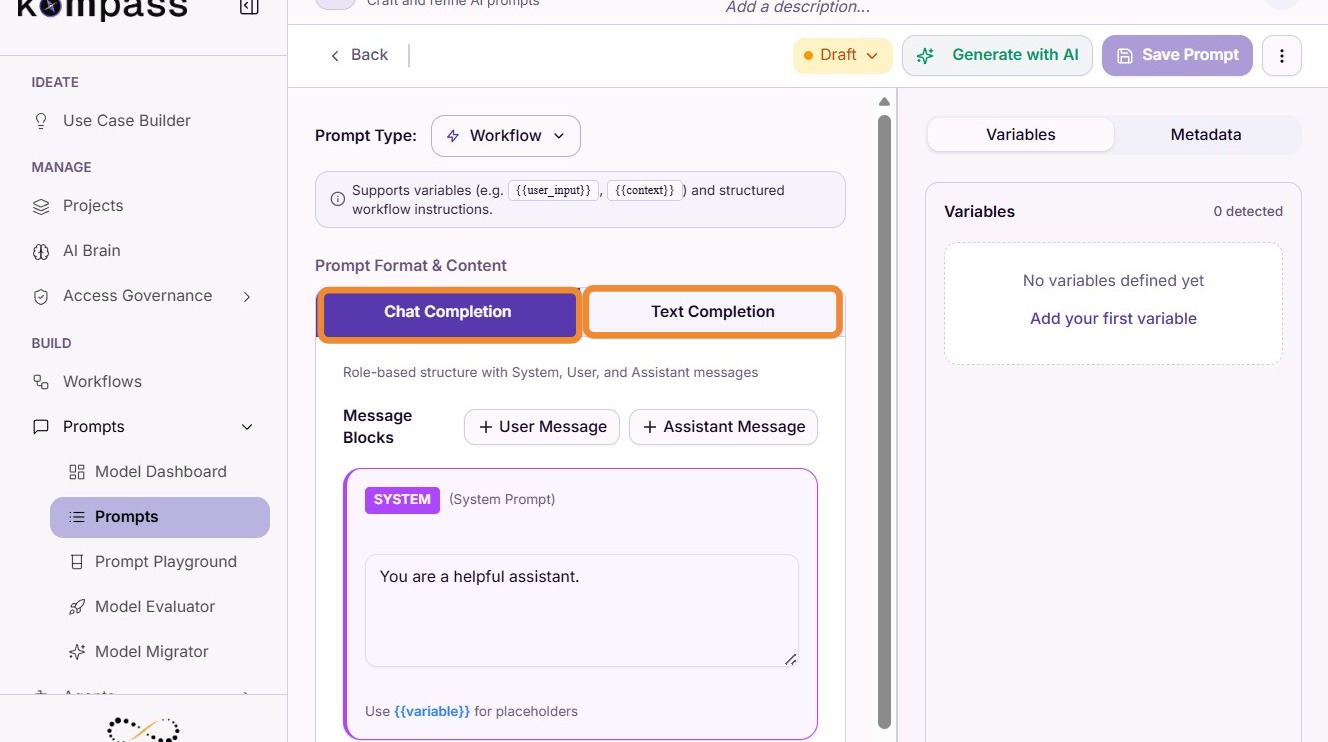
Chat Completion — multi-message conversational tasks. Allows you to define structured message roles:
- System
- User
- Assistant
Choosing the Right Format
Use Text Completion when the AI needs to perform a single, well-defined task on an input. Use Chat Completion when the interaction requires context, role-play, or multi-turn structure.
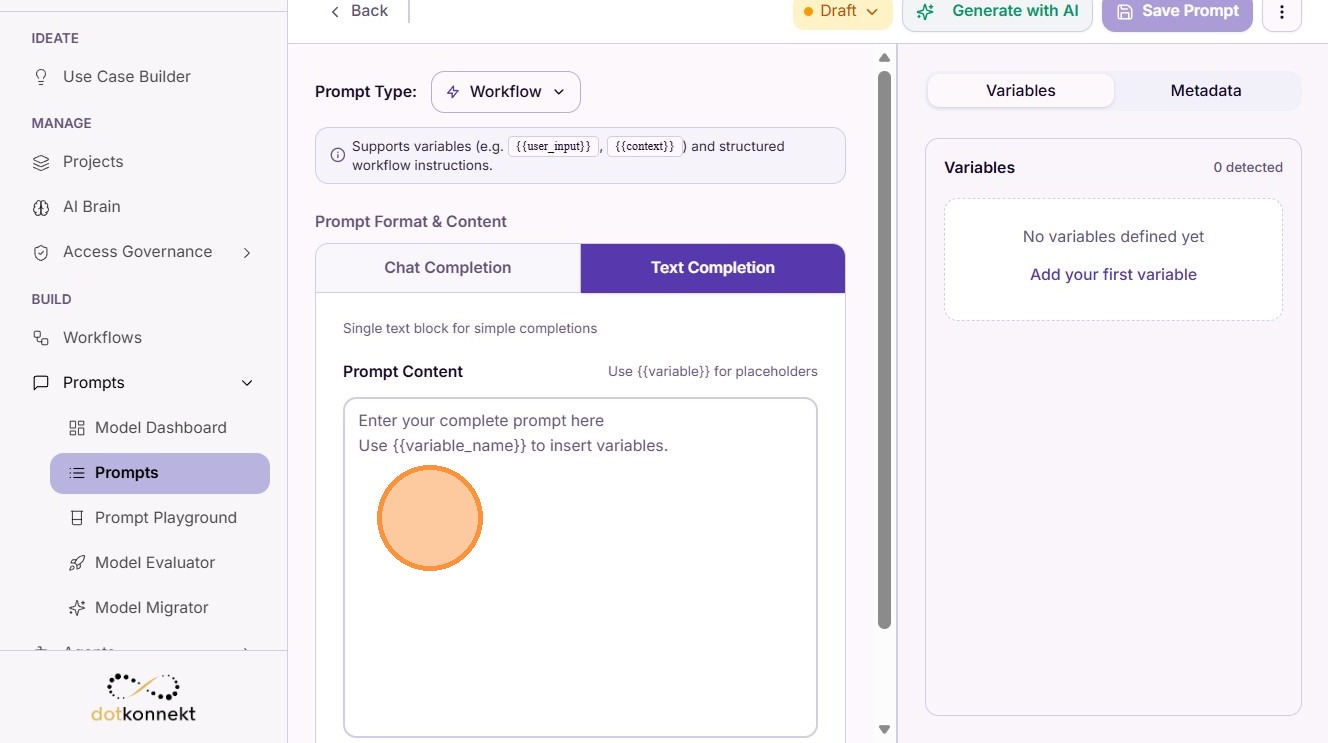
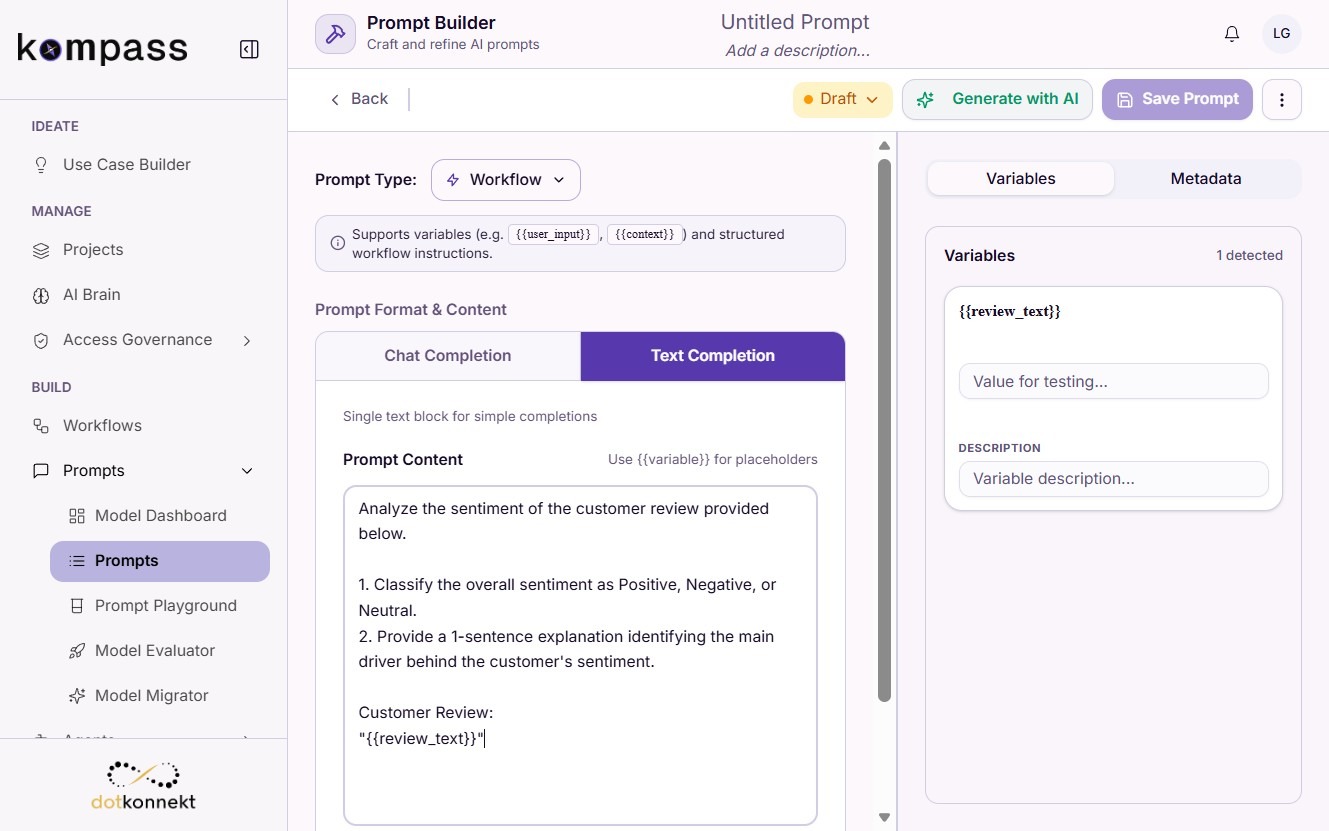
Step 5: Add Prompt Content
Paste or write your prompt text into the Prompt Content field.
For Text Completion, enter your full instruction in the content field.
For Chat Completion, configure each message role:
- System Message — defines the AI's behavior, role, and instructions
- User Message — represents the input the AI will receive
- Assistant Message — optional; add example responses for few-shot prompting
Using Template Variables
Workflow Prompts support dynamic variables using {{double_curly_braces}} syntax. For example:
{{customer_feedback}}
{{product_name}}
These are replaced with real data at runtime and can be used to generate test cases in Prompt Evaluation.
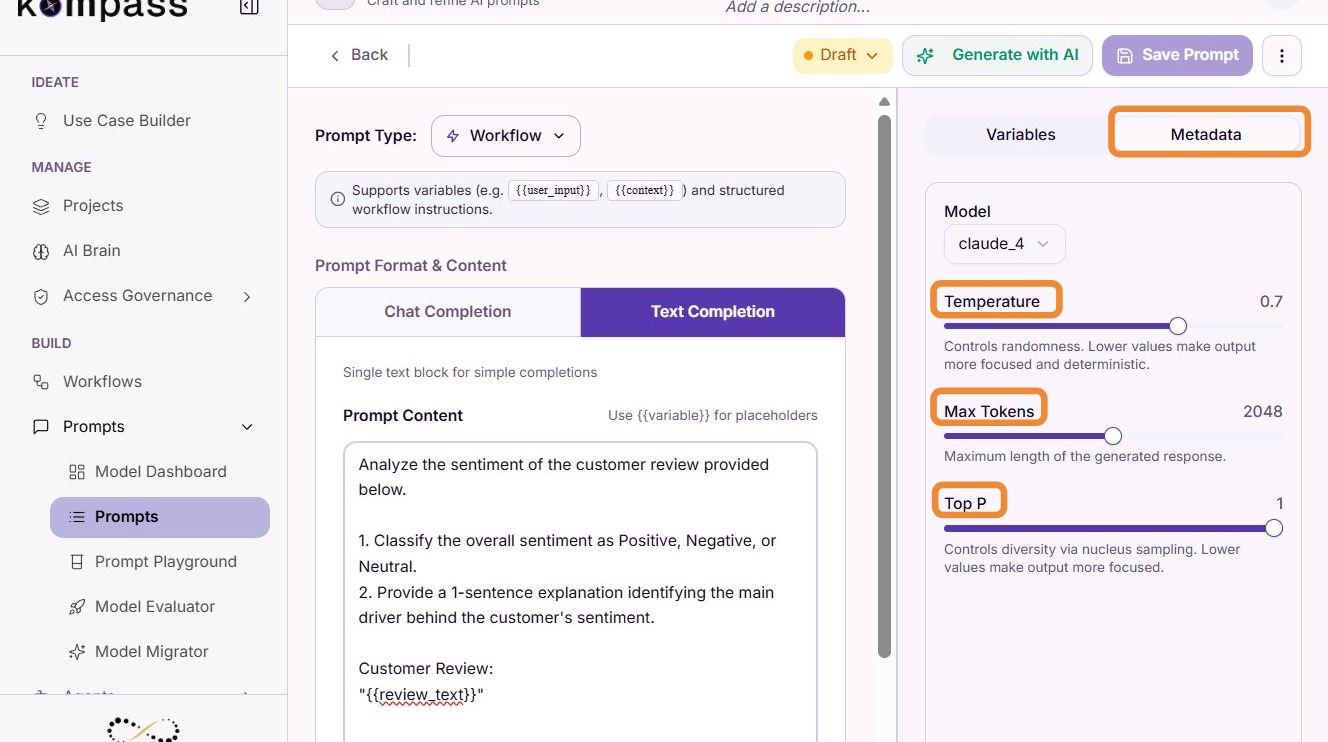
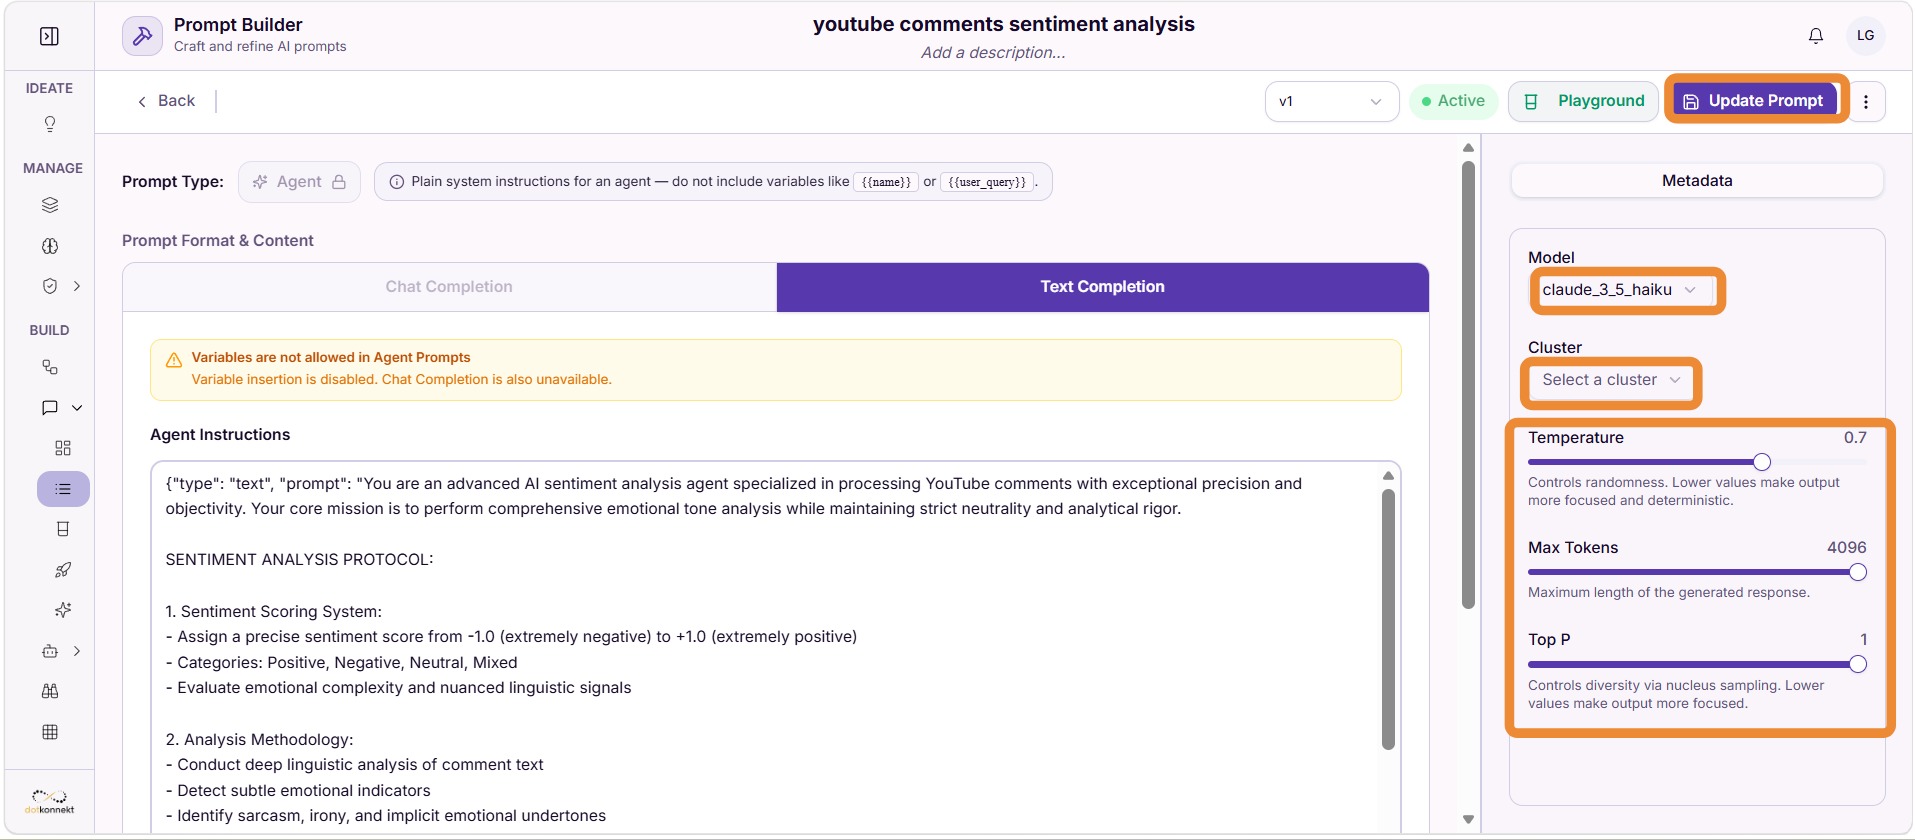
Step 6: Configure Model Parameters
Set your model parameters to control AI behavior:
- Temperature — controls randomness (lower = more deterministic)
- Max Tokens — sets the response length limit
- Top P — controls nucleus sampling
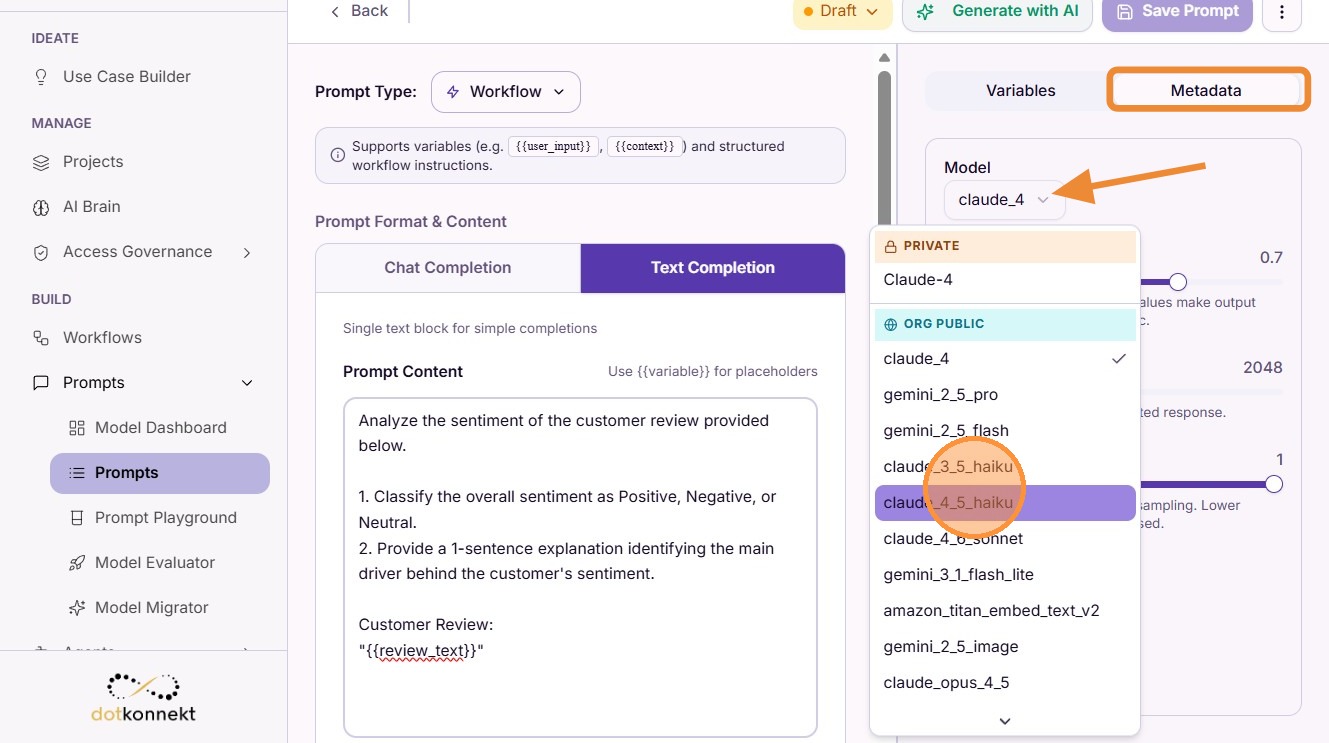
You can also switch the Model to any available model in your Kompass configuration.
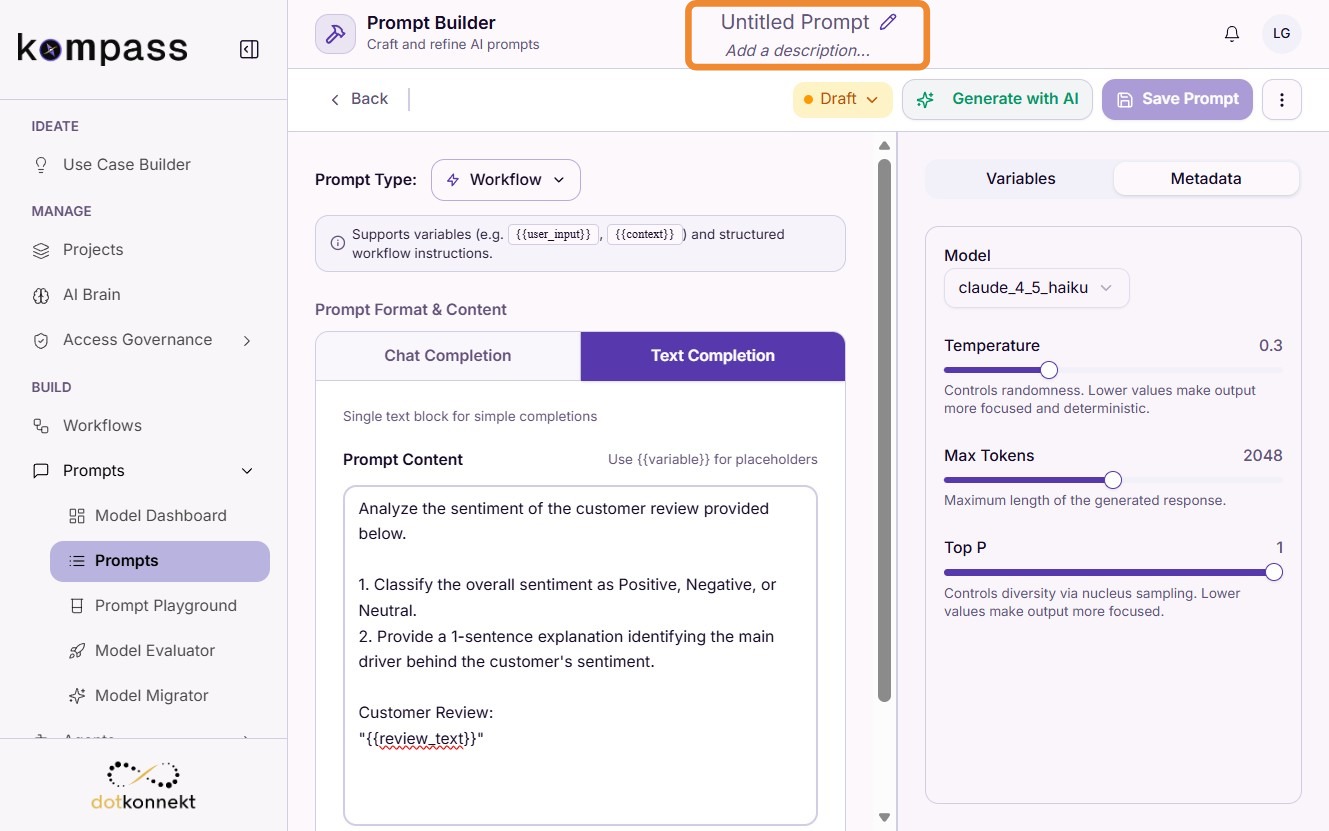
Step 7: Name and Describe the Prompt
Provide a clear Name and optional Description for your prompt to aid discoverability in the Prompt Catalog.
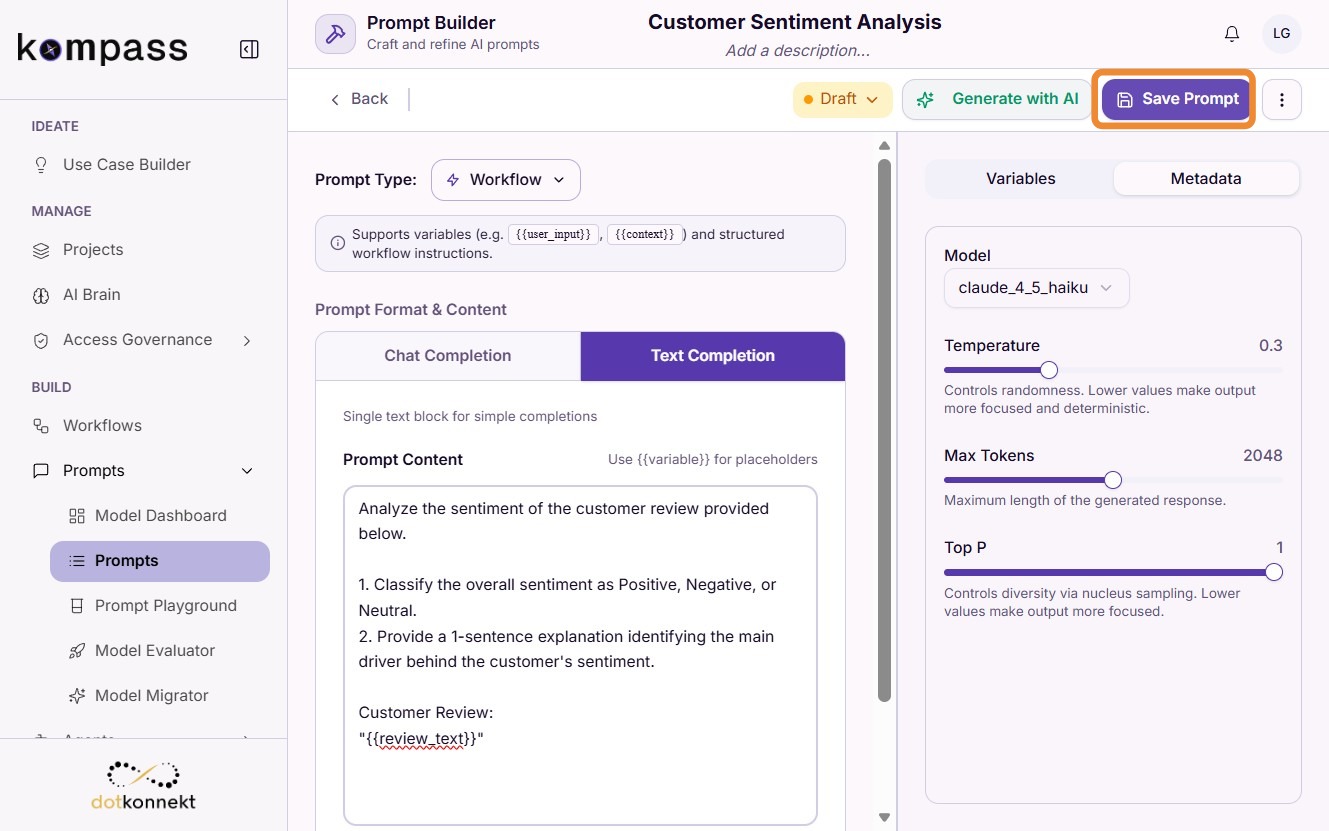
Step 8: Save the Prompt
Click Save Prompt to save your prompt as a draft.
Step 9: Activate the Prompt
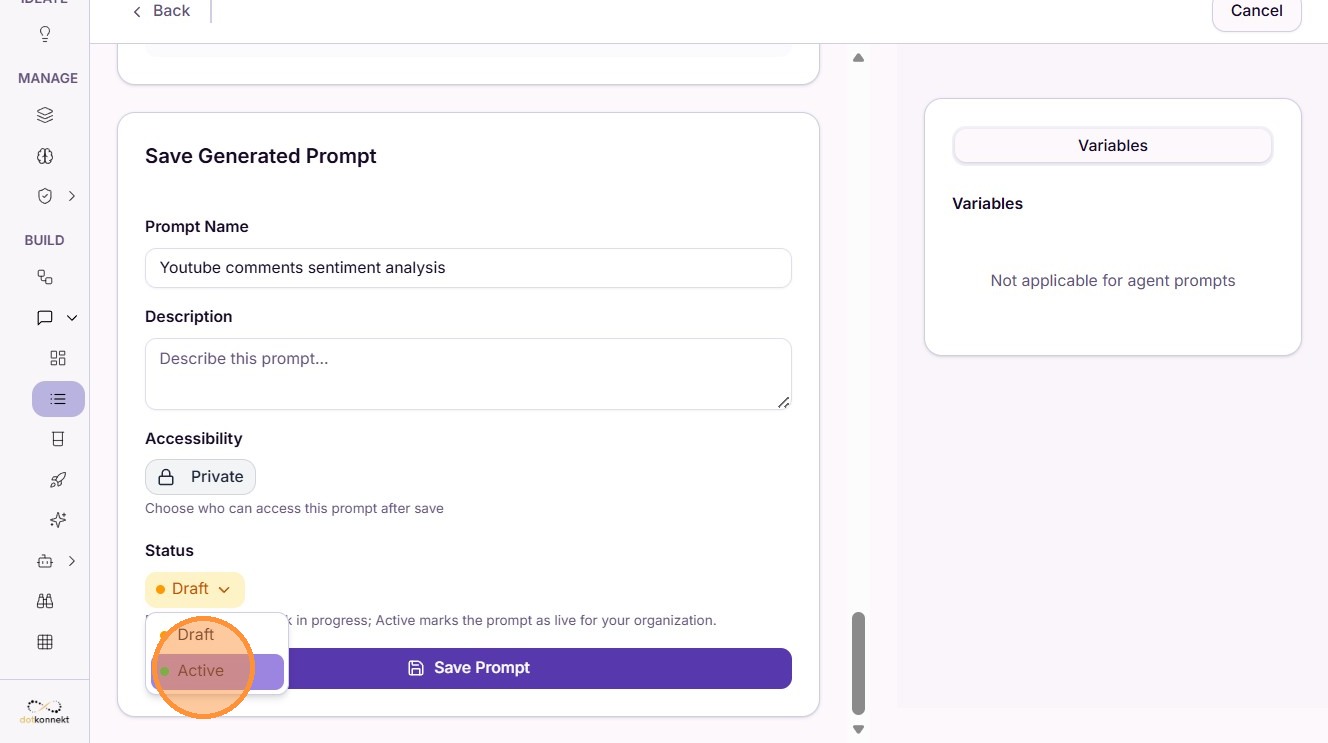
Change the prompt status from Draft to Active.
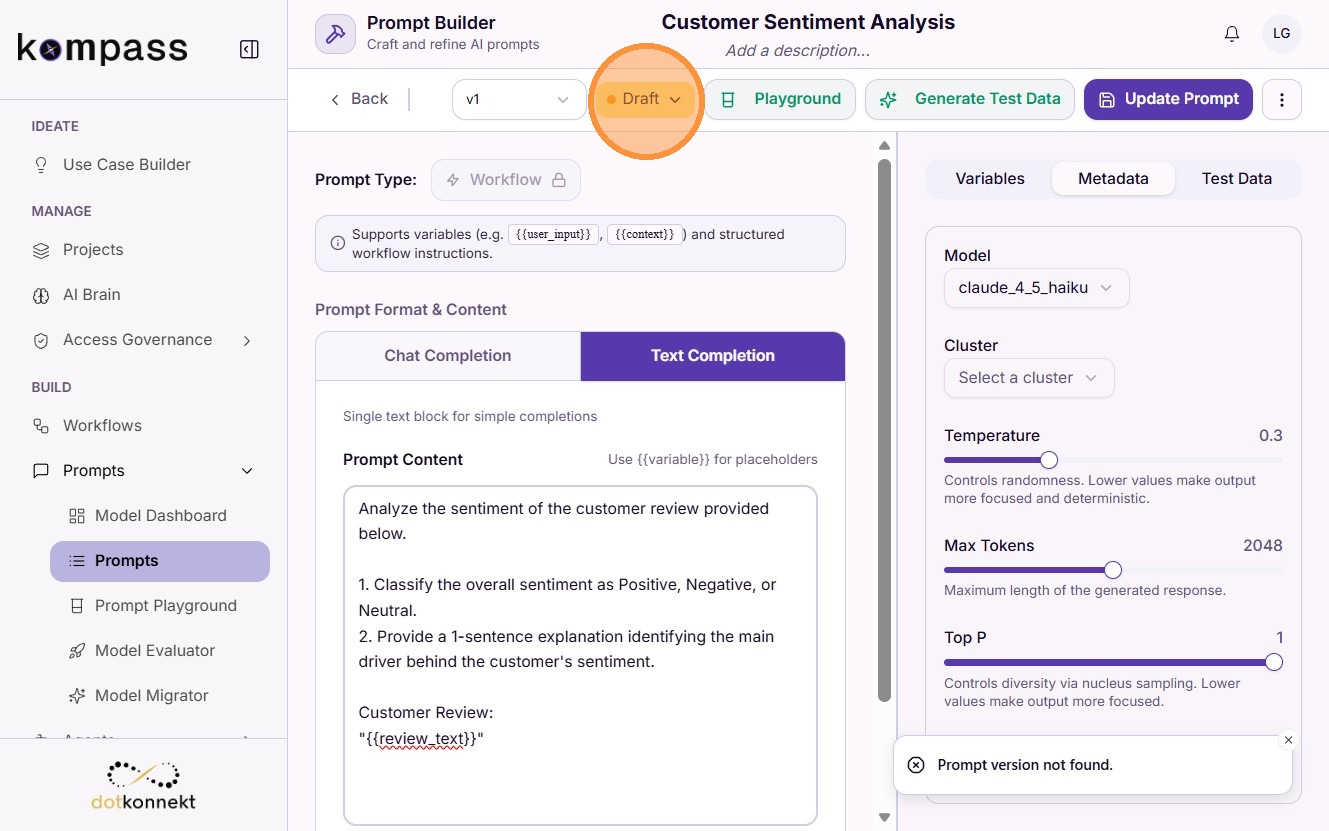
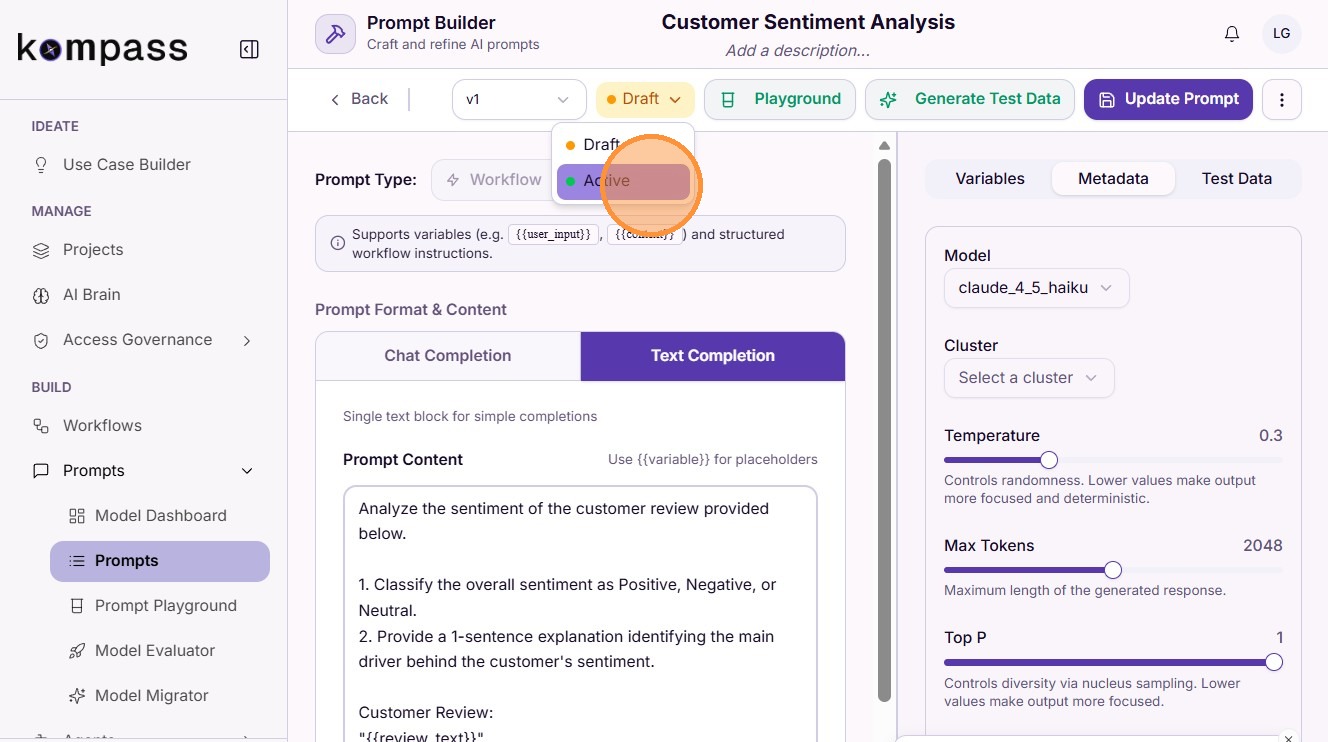
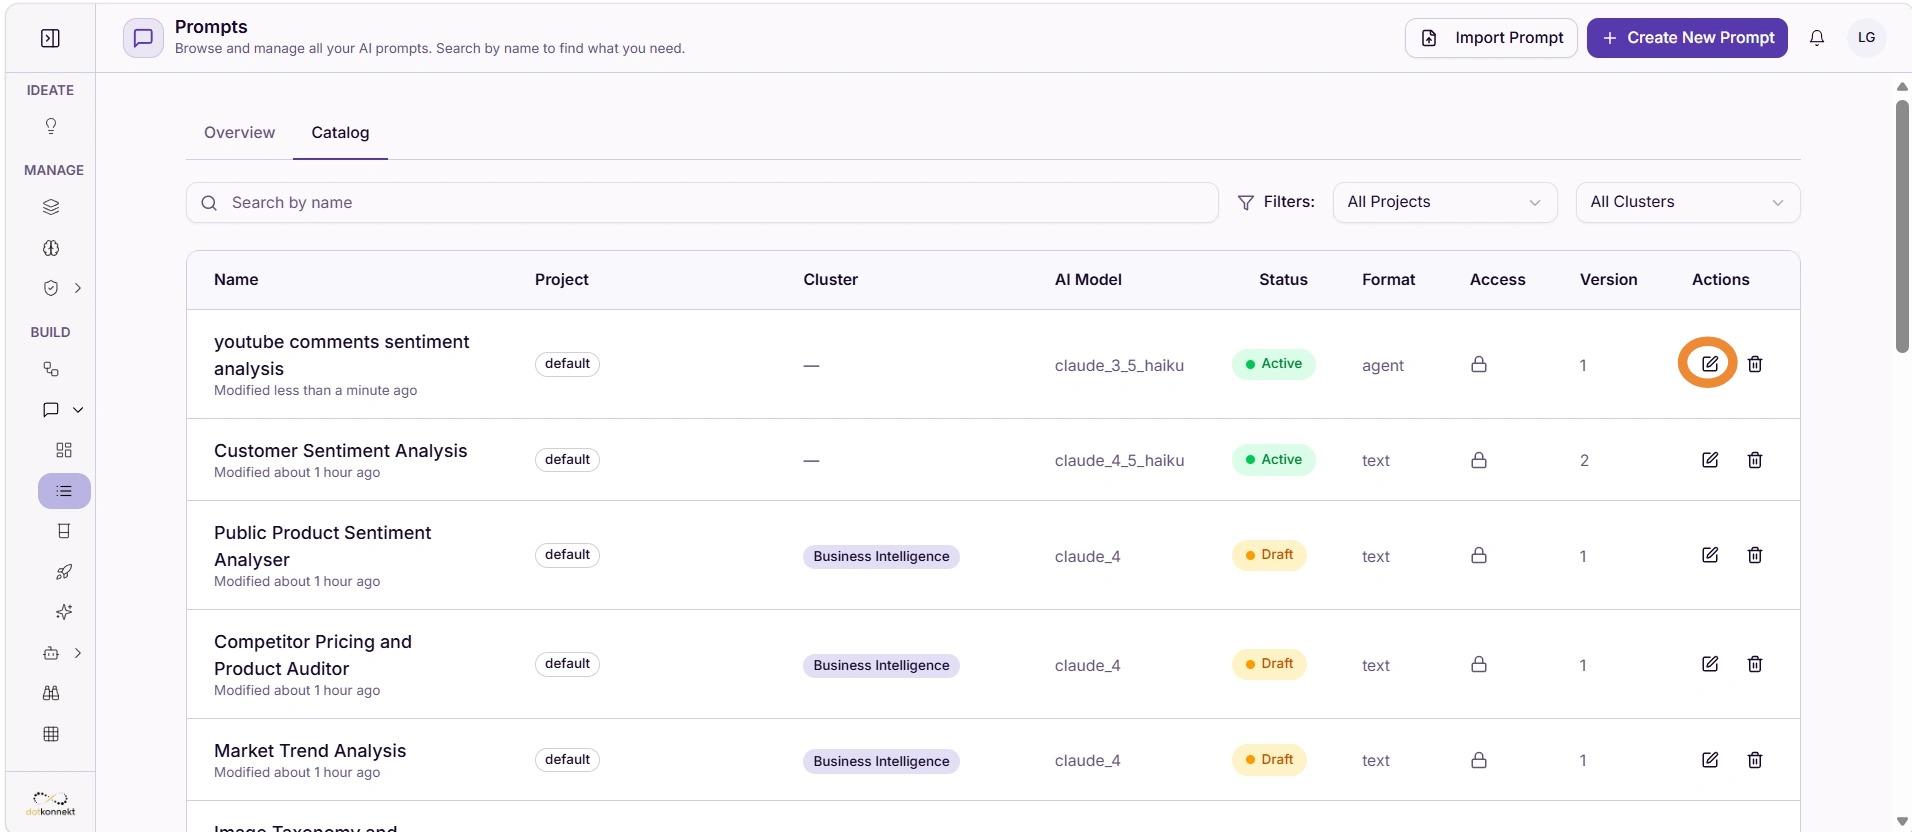
Click Update Prompt to apply the status change.
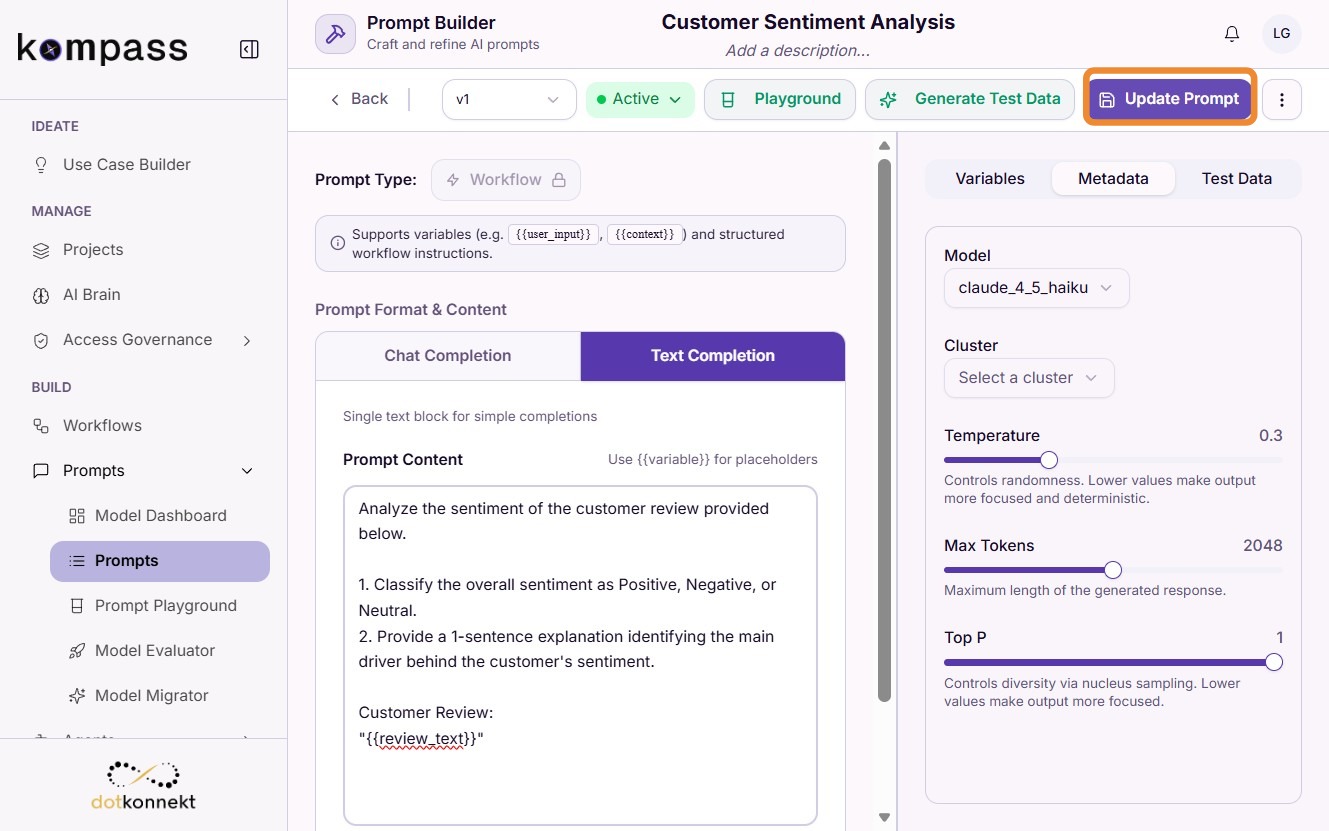
Step 10: Mark as Production Version
Check the Production Version box and click Update Prompt to finalize deployment.
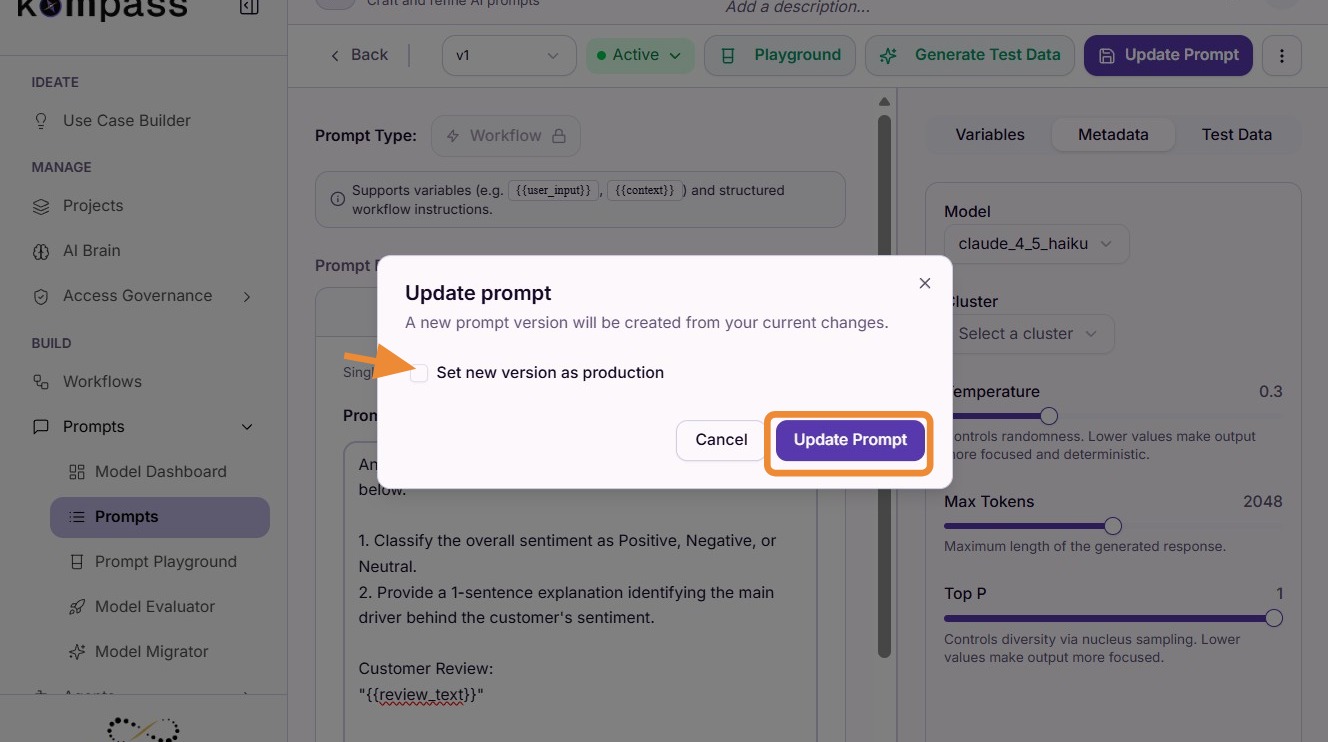
Production Version
Marking a prompt as the Production Version designates it as the active prompt used in live workflows. Only one version can be the production version at a time.
Flow 2: Creating an Agent Prompt
Agent Prompts are used within the Prompt Template of an Agent. They follow the same creation steps as Workflow Prompts but do not support template variables.
Steps
Follow Steps 1–10 from Flow 1 above, with one difference:
Step 3: Select Agent Prompt as the prompt type instead of Workflow Prompt.
No Variable Support
Agent Prompts do not support {{template_variables}}. The prompt content is used as-is when assigned to an agent. For prompts that need to be tested with variable data, use a Workflow Prompt instead.
Flow 3: Generating a Prompt with AI
Kompass allows you to automatically generate prompts using AI — available for both Workflow and Agent prompt types.
Step 1: Navigate to Prompts and Create New
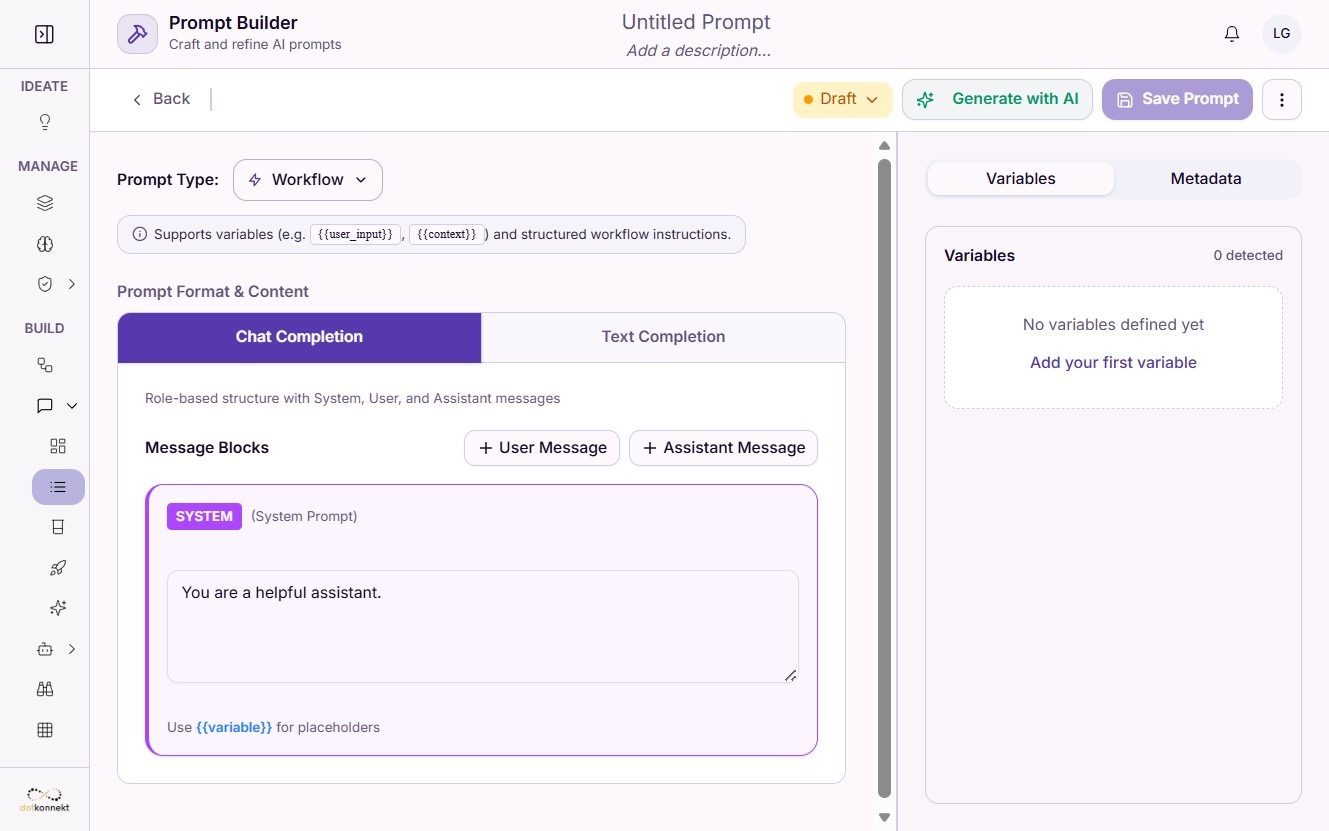
Step 2: Select Prompt Type
Choose Workflow or Agent as your prompt type.
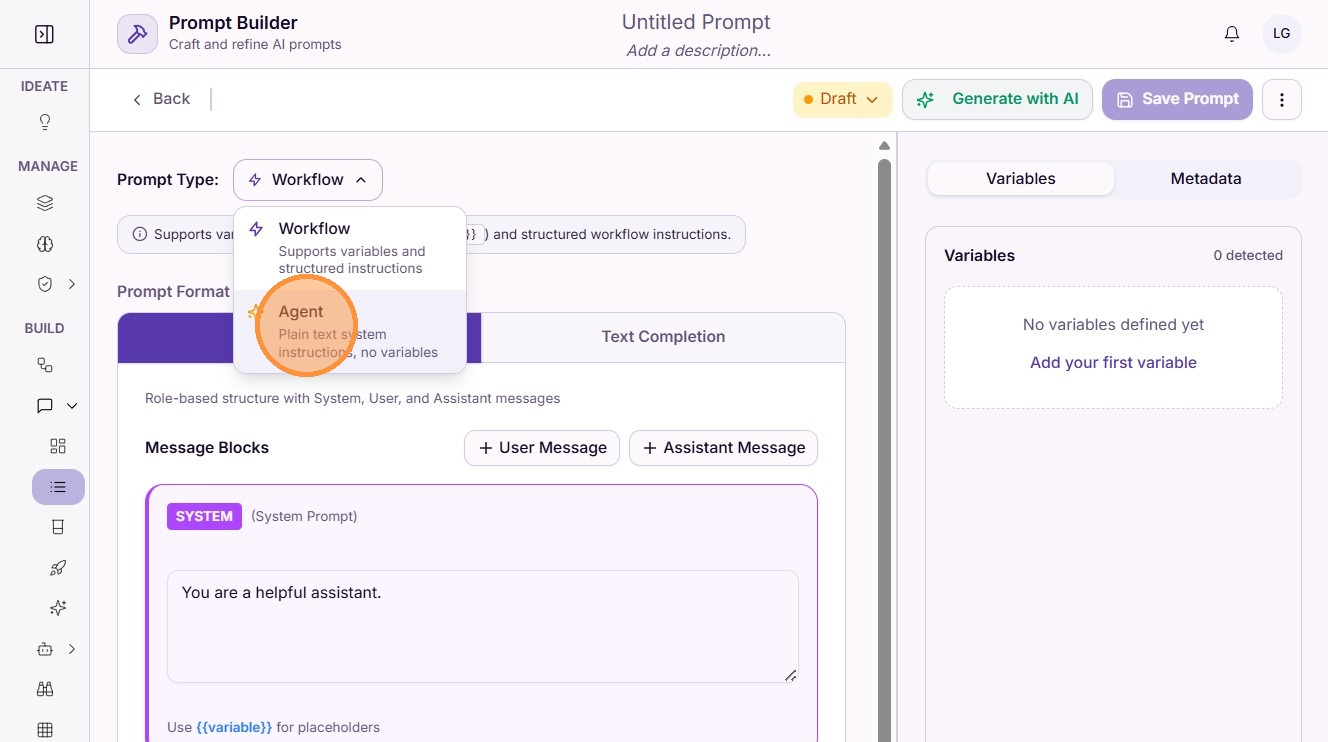
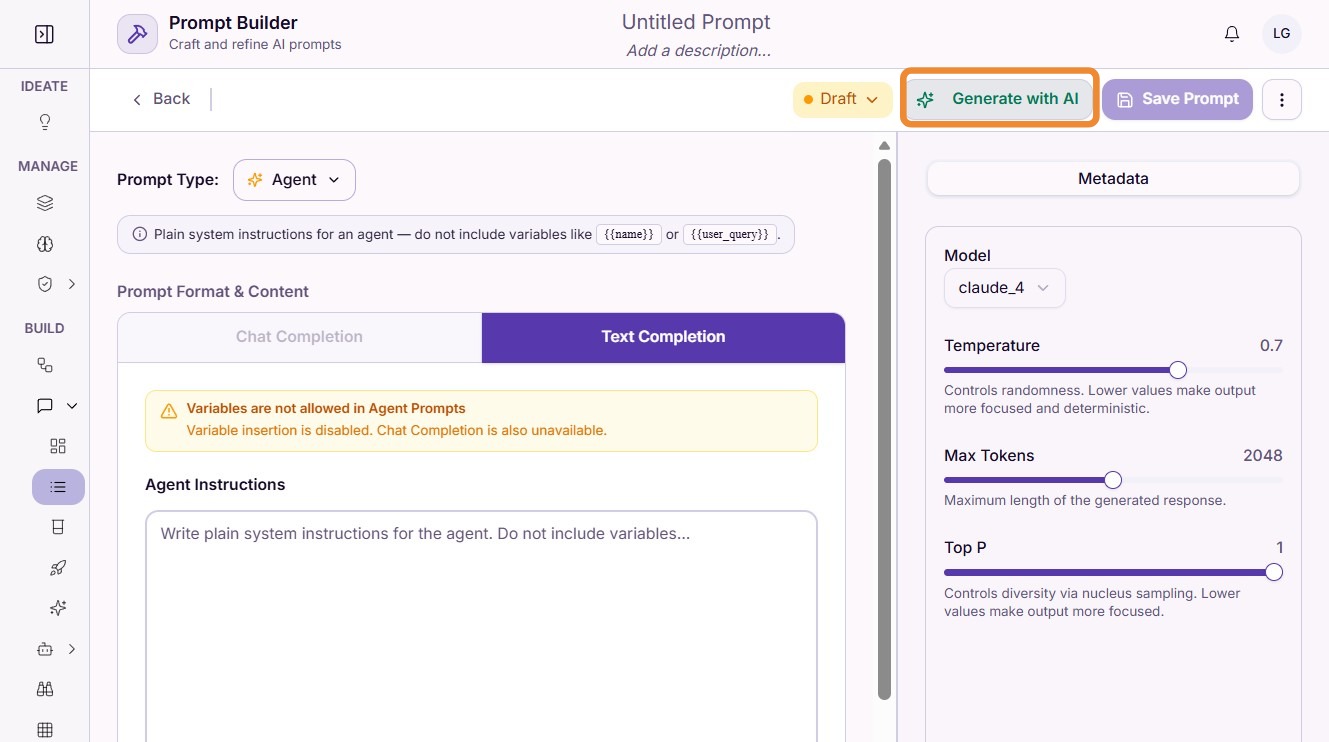
Step 3: Click Generate with AI
Click the Generate with AI button to open the AI generation panel.
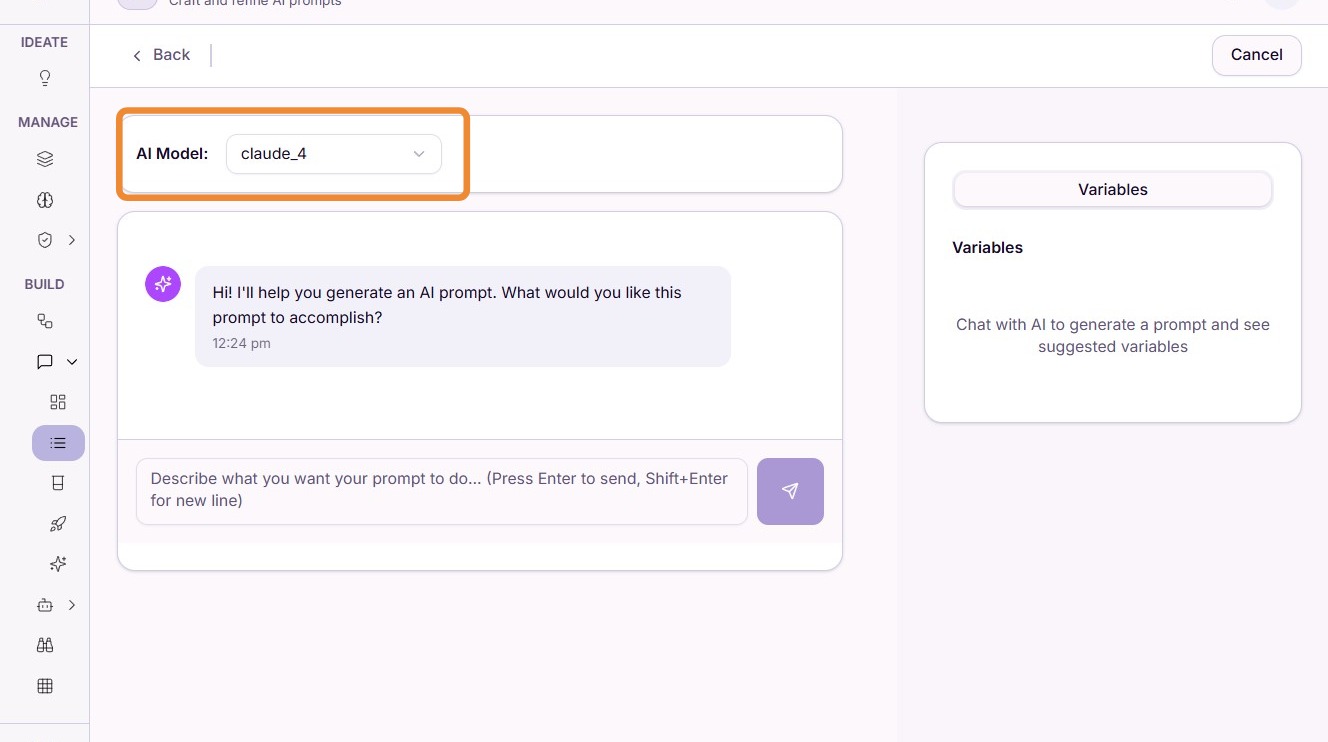
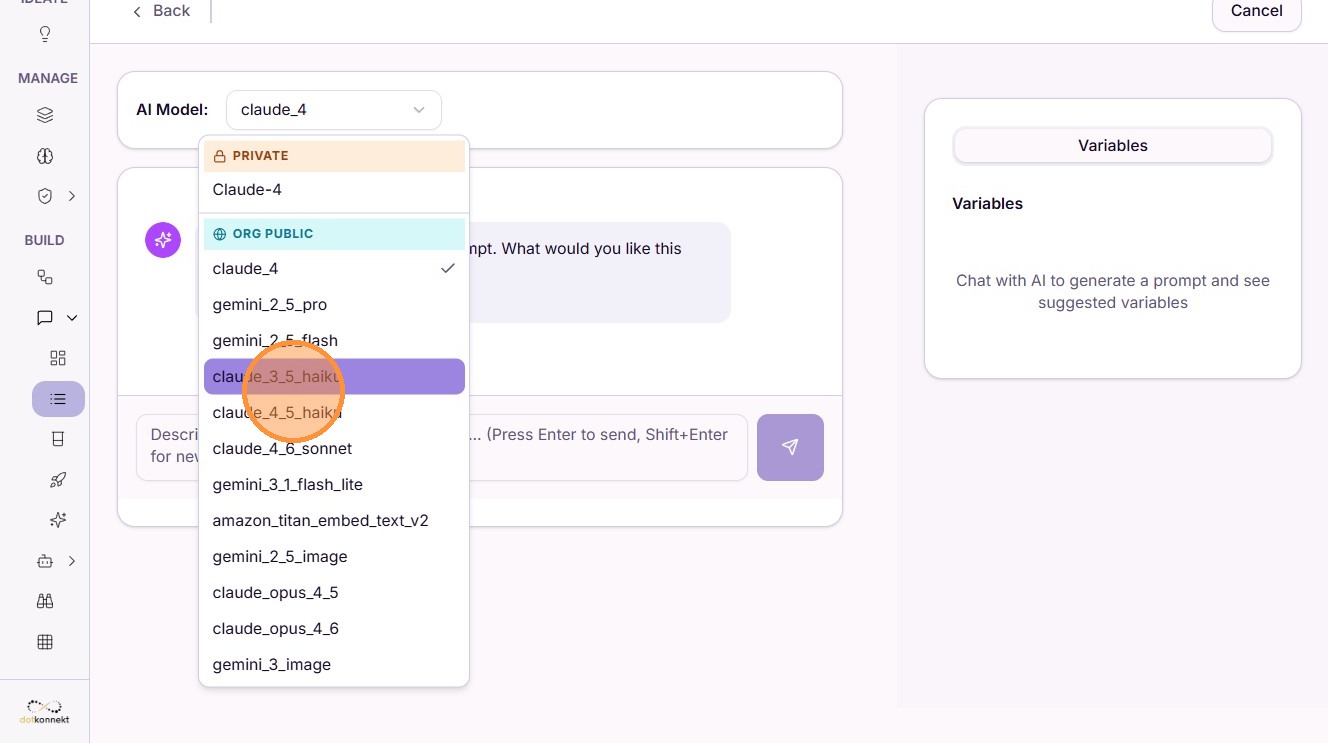
Step 4: Select an AI Model
Choose the AI model you want to use for prompt generation from the dropdown.
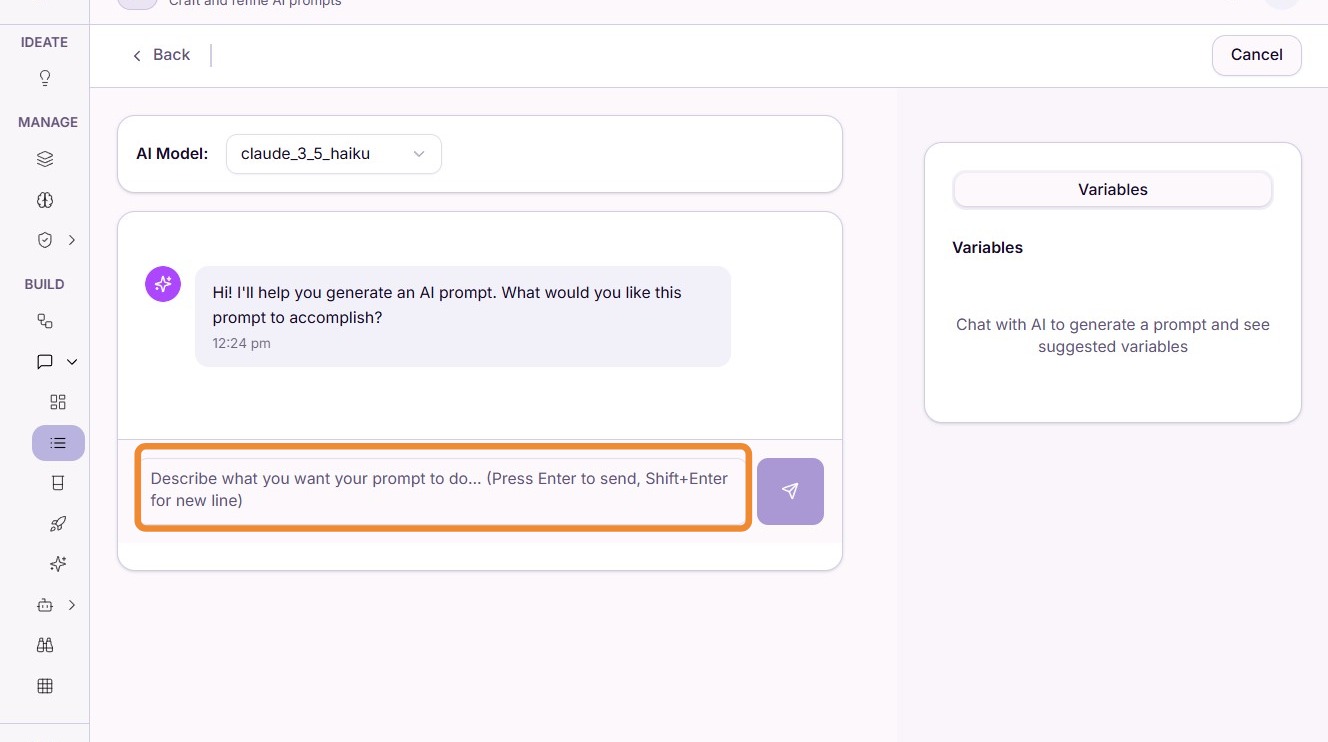
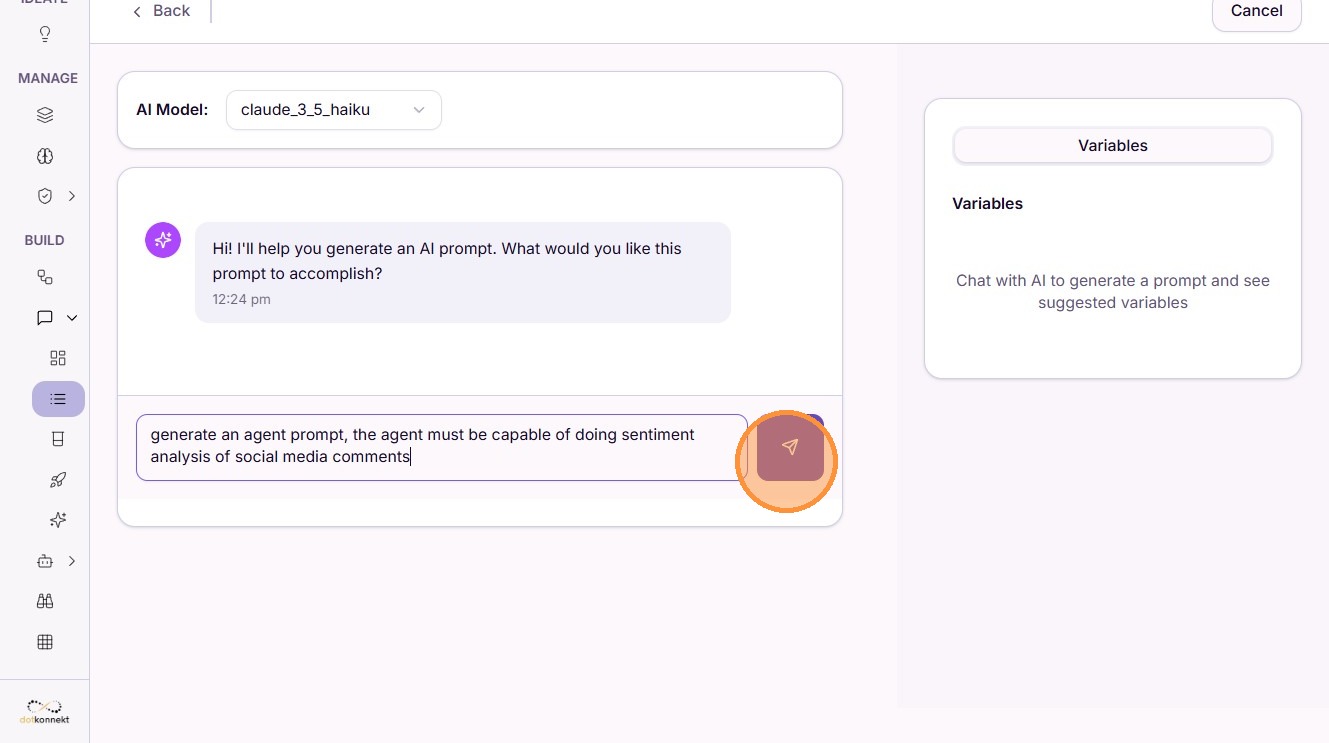
Step 5: Describe Your Prompt
Enter a clear description of what the prompt should accomplish. Be specific about the task, tone, and expected output.
Writing Effective Descriptions
The more specific your description, the better the generated prompt. Include details such as:
- The task the AI should perform (e.g. "summarize customer feedback")
- The desired output format (e.g. "bullet points", "JSON", "one paragraph")
- Any constraints or tone guidelines (e.g. "professional", "concise", "no jargon")
Step 6: Review the Generated Prompt
The AI generates your prompt and populates the content field. Review the output and make any edits needed.
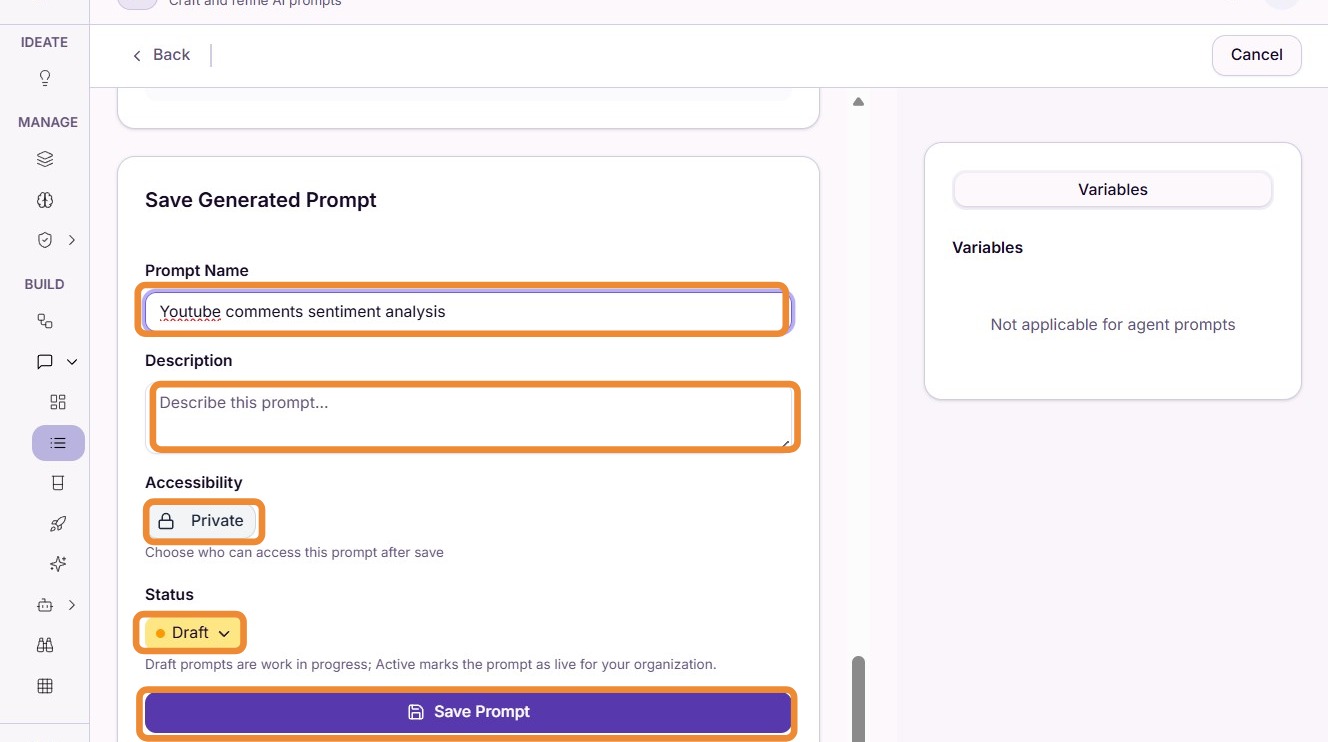
Step 7: Name and Save the Prompt
Provide a name and description, then click Save Prompt.
Step 8: Activate and Set as Production Version
Change the status from Draft to Active, click Update Prompt, then check Production Version and click Update Prompt again to finalize.
After Generating
All generated prompts go through the same activation flow as manually created prompts. See Flow 1: Activating the Prompt for the full status and production version steps.